Tutorial: Start animating with our free AI mocap tool Rokoko Video
Below, please find the transcript and time stamps of the video tutorial - Enjoy!
Get started with Rokoko Video
Hey, what's going on everyone? We are so excited to announce the release of Rokoko Video, which is our new free AI motion capture tool. So now you can either record yourself live or upload a prerecorded video with say your cell phone and Rokoko Video will spit back a motion capture file that you can use that also includes foot locks all for free. It's super easy to use. You access the tool from your browser and then you can open up Rokoko Studio to do a little bit of cleanup and export the mocap out to the program of your choice. So in this video I'm going to be showing you how to use the new tool. We've been having a blast playing around with it and we're sure that you will too. So go give it a try at the length that's up above and let's get into it.
So before we get started, I just want to talk about some of the limitations of the program, right? So obviously this is not a motion capture suit. This is a computer vision style of motion capture. So it's not going to be as accurate as if you were wearing a smart suit Pro two or some other sort of motion capture suit. It's also important to note that occlusion can be an issue, so that's when your body parts pass out of sight of the camera, right and the camera loses track of what they're doing. So you can get some bizarre results if the camera stops seeing your limbs momentarily. Usually things like this are really easy to clean up and post, but it's just important to be aware of the limitations but also despite the limitations, how great it is to quickly be able to iterate and record a bunch of mocap super easily and then get it onto your characters immediately.
How to sign up for Rokoko Video (01:39)
So let's get started making some mocap. You can get to the Rokoko Video site either from the link of the description below or from Rokoko.com. You just need to sign in using your Rokoko id. If you don't have one, you can just sign up for free. It's quick and easy. I made a little test account for this video so I'll be using that. But you can also continue to sign in with Google. Once you sign in, you'll get a few info pages with just some do's and don'ts about Rokoko Video. And here we are. This is the main page for Rokoko Video. So to create some mocap, the first thing we'll do is hit “create new scene”. We will then name our scene and then we get the option to either record using our device camera or select a local video file. First I wanna show you how to record live using your webcam.
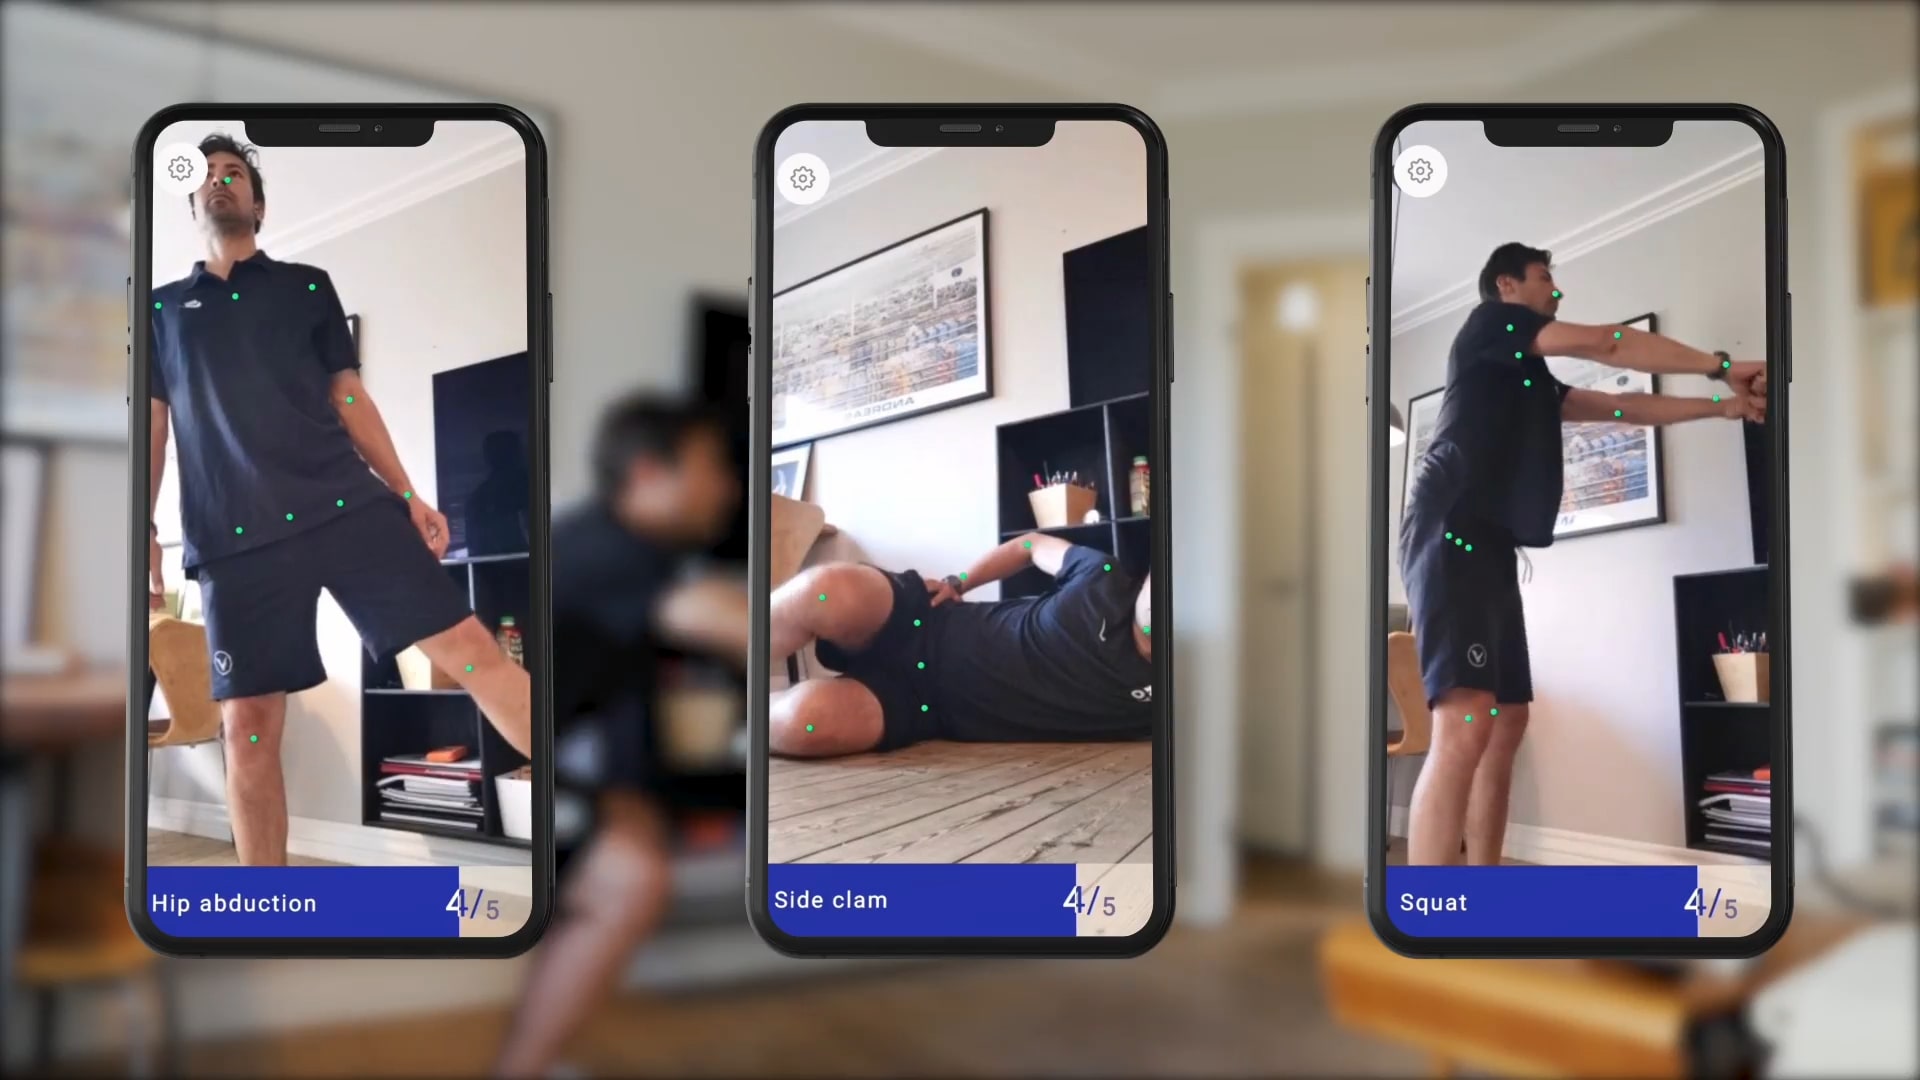
So as soon as you hit the button, you'll see that you get the little webcam popup up at the top here. You can mirror the video if you want and then you can also change your video input device. Now let's go over some best practices for using Rokoko Video. The first thing you want to do is make sure that your entire body is in the scene. You don't ever want your arms or legs to exit the frame of the camera. You also want to be sure to not wear any black. The more black that you're wearing, the harder time the software has to actually track the rotations of your limbs. Perhaps the most important part about Rokoko Video is that you really can't use moving footage, so you wanna make sure that your camera is on a tripod or sitting on a table. And also hip height is usually okay, but this also works. This is about head height, so if we hit “record”, we get a few moments to step back into our scene and then we get a little countdown. Here we go, all record, some simple motions, couple jumps, couple karate moves, and there we go.
How to record with Rokoko Video (02:08)
As soon as you hit stop, you'll see your recording and then you can actually trim your recording to the parts that you want. For example, I'm going to trim out the end when I walk towards the camera because my legs go out of frame. After that, you just hit “turn it into animation”. At this point, Rokoko Video will take over and start processing your video take. The general rule of thumb for processing time is three to one, so if you have a 32nd video, it should take about 90 seconds to upload and process. However, depending on how many people are using Rokoko Video at the same time, this can take a little bit longer. But as soon as the text changes from uploading to processing, you can close your browser window and it will continue working in the background. I usually just keep the browser open. However, to be safe, especially if I'm recording live, instead of uploading a pre-recorded video, once the video is finalized, you'll be able to open up re Rokoko Studio and look at your mocap. However, before we do that I want to go through how to upload a video. So we'll jump back to the main page of re Rokoko Video and we'll create a new scene just to keep things clean. Here you can see that we already have our Rokoko Video test oh one scene. I'll just make a Rokoko Video test oh two and this time I'll hit “select local video file”.
So now we'll be offered the option to either browse on your computer to find the file or you can actually just drag in your video clip. You can use either vertical or horizontal videos. This is a video that I just recorded on my phone and it's also good to know that using the wider angle cameras on your phone like five may give a little bit more distortion in the final result. But I generally find it's fine and it means that I can be working in a smaller space, which is much more convenient. The great thing about uploading a video clip is not only that you have the original video in case something goes wrong, you need to reprocess it, but you can also record a number of different motions in the same video clip and then just trim down to the one that you want to work with. So if you had a scene with a couple different characters, you could just record one video file with all of their animations and then just trim out the specific ones as you go. We'll hit “turn into animation” and we'll go through the same process of uploading, syncing, processing and finalizing.
How to clean up and export your mocap (06:04)
Okay, we're done. So now how do we actually see our mocap? Well, to get your mocap, you need to download and open up Rokoko Studio Beta. You can find that program on Rokoko.com for free. You just go to products, software and then download Studio.
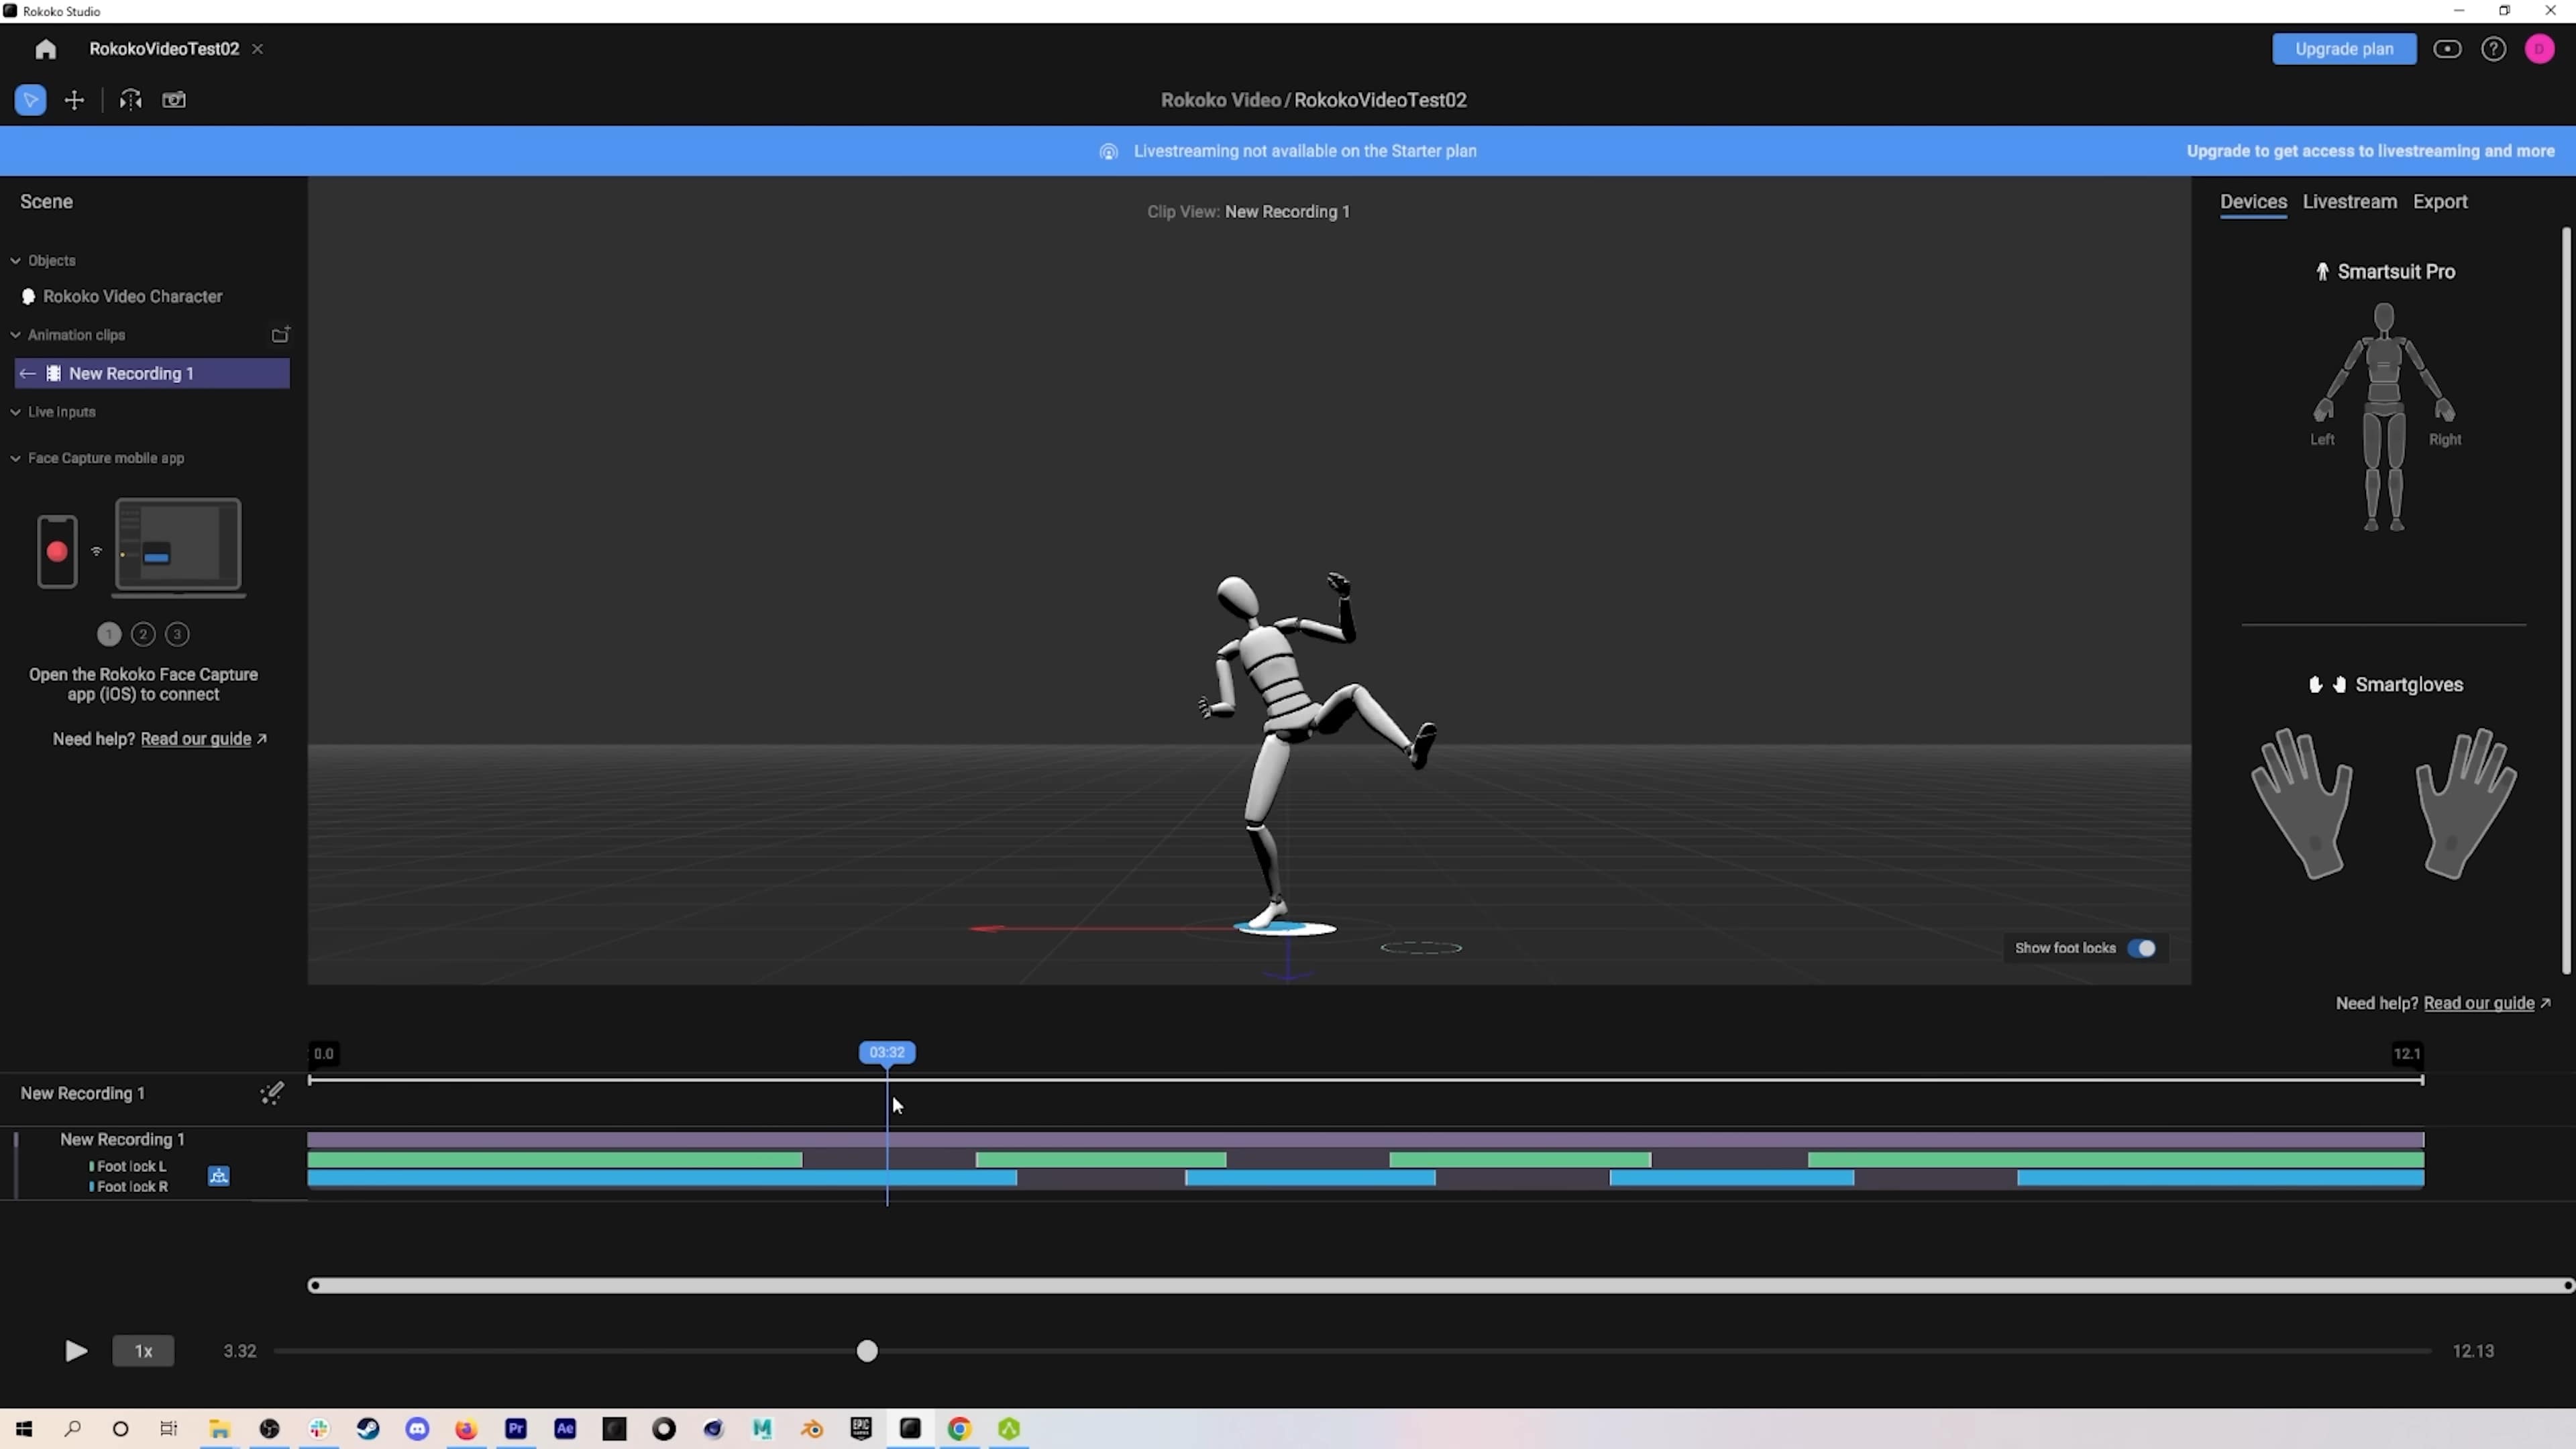
As soon as you download, install and open up Rokoko Studio, you'll just log on using the same Rokoko ID that you did for Rokoko Video. And there you go. You can see as soon as we open up Rokoko Studio, we have our two Rokoko Video takes that we recorded. As you record, new Takes will show up in this Rokoko Video project that's created for you automatically, but our takes are separated by scenes just to keep it clean. Again, I'll open up that Rokoko Video test oh two. So at this point, the process is almost exactly the same as it would be if you used a Smart Suit Pro or any of our other hardware to record mocap into Rokoko Studio. You can see that we have our animation and then down here at the bottom on the timeline we have the foot lock key frames.
The green bars indicate when the left foot is on the ground and the blue bar when the right foot is on the ground. So this take actually looks great, but oftentimes you will need to do a little cleanup to your foot lock key frames. You can visualize those foot locks in the scene by clicking this little gizmo. And for the purposes of this video, I'm just going to kind of mess up these key frames because oftentimes you won't actually get a perfect recording in Rokoko Studio. You will need to do this cleanup. So if I extend out this key frame, you can see that Rokoko Studio now thinks that my left foot is going to stay on the ground throughout this entire movement. If I play this back, you can see that this looks much worse, not correct at all. And again, that's just because Rokoko Studio thinks that my left foot is on the ground when we know that my left foot was not on the ground.
So if you run into errors like this in your results, you can fix them by adjusting the foot lock key frames, and that should make your take look a lot better. The other thing you can do is turn on what we call treadmill mode. So if I click this little wand here down in the bottom left, I can turn off locomotion. And what that basically means, as you can see, is that we eliminate any of that foot locking. Now obviously this isn't good if we need to be seeing the feet. However, if you just need the upper body, this can be an easy way to just get a really good result without playing around with the foot lock key frames. What's really important to know is that this is the very first version of this tool and we are going to continue to improve it with your feedback. If we're satisfied with their take, we can go and right click on it and select export,
And then we can open up the export tab. Over on the right we have a bunch of different options on export. We can choose what type of export, so fbx or bvh. We can include the body skeleton. We can also include a body mesh, for example, if we're importing into Unreal, we can choose the skeleton. We can set the skeleton reference TPOs on frame zero. This is something I always recommend having checked and is really important when it comes to retargeting. You always want a TPO on that frame zero. Finally, we have some more settings that are related to the FBX type we're exporting and then you can see where we're going to export out to. If we had export, boom, there we go. We can open up that folder to find our file and then bring it into our software package. As I said before, this process is almost identical to how you would treat mocap data that you record using our Smart Suit Pro.
So you can check out any of our tutorials for the Smart Suit Pro in Rokoko Studio Beta. If you are confused or you want to find out more information on how to use the program, that is our brief introduction to re Rokoko Video. We are going to continue to improve this tool as we find out more about how it's being used and as we get more feedback from customers. But we are so excited with how this tool came out and that we're able to offer it for free to everyone. We hope you enjoy it. We hope you play around with it. And we're also going to have some challenges and contests coming up where you can use Rokoko Video to win some awesome prizes. Check out our social channels for more info about that and we'll see you in the next Rokoko Video update. Thanks so much.
Frequently asked questions
Read more inspiring stories
.jpg)


Book a personal demonstration
Schedule a free personal Zoom demo with our team, we'll show you how our mocap tools work and answer all your questions.
Product Specialists Francesco and Paulina host Zoom demos from the Copenhagen office


