Tutorial: How To Turn Your Custom Mesh into a Metahuman
Editor note - Metahuman Creator is in active development and is frequently updated. This article was written in August 2022, and the exact process may have changed or a range of new features may be added. We will update this article as appropriate. If you have questions, feel free to jump onto Rokoko’s community Discord.
Ready for some good news today? A new Metahuman plugin that’s about to eliminate 99% of the work you put into creating digital human game characters. The mesh-to-metahuman plugin feature allows you to turn any 3D human mesh into a Metahuman in a few simple steps. This makes it easier than ever to create epic content, ready-to-animate characters from photogrammetry scans of an actor, and even more stylized characters from downloaded meshes created using traditional modeling tools.
Today we're going through the entire mesh-to-metahuman workflow, and we're going to get our metahuman hooked up with Rokoko motion capture. It’s a great workflow for indie game developers and studios. This tutorial will use a custom facial mesh (also known as a bust sculpt), but the method should also work for a full body scan. Download the free resources used in this tutorial here →
What requirements does your mesh need for the Metahuman plugin to work?
It’s not a complicated process as long as you keep in mind a few simple rules:
- Your mesh needs a UV Map. Even an auto-generated UV map will do. If your mesh doesn’t have a UV map, open it in 3D software like Cinema4D or Autodesk Maya and quickly generate one.
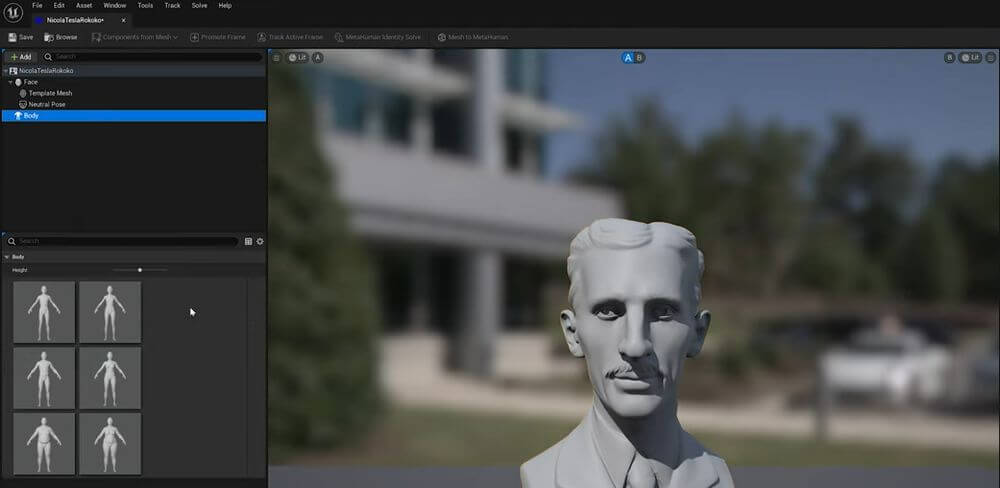
- You need to remove all hair obstructing the face. If there are hair elements on the forehead or cheeks of the original mesh, Metahuman Creator won’t be able to interpret the shape correctly. If the hair is modeled on the skull but isn’t overlapping anything (like on our Nicola Tesla model shown below), it’s perfectly usable.
- Delete all non-essential elements. Remove anything not part of the main mesh, such as jewelry or clothes. If you’re using a textured mesh, remove it and apply the standard object texture.
- Only the eyes, nose, and mouth region is 100% necessary. You don’t need to follow a metahuman topology template or anything fancy. This plugin is pretty robust as long as it has those key features for a facial rig. You can remove a large portion of the mesh without issue. Even the ears aren’t essential.
With your bust cleaned up and saved as a .fbx, go back into Unreal Engine, create a new project, and import the mesh. To continue, you’ll need to download two plugins:
- Free Metahuman plugin for Unreal Engine (find this on Unreal Engine marketplace)
- Free Rokoko Unreal Engine plugin (to enable motion capture)
Once downloaded, enable both plugins in your project and restart Unreal.
How to create a custom Metahuman from your mesh
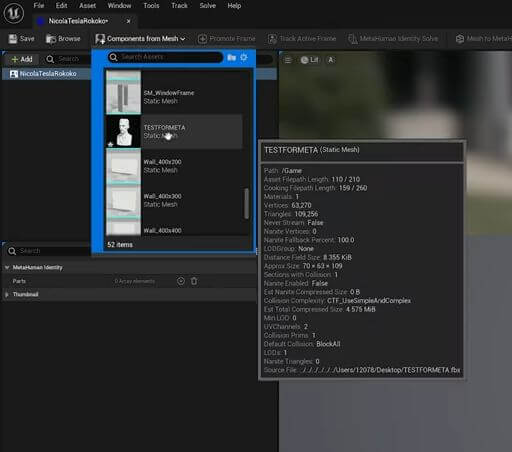
With the mesh in your project file and your plugins installed and activated, you’re ready to go. Right-click in the content folder (where your project’s assets are) and search for “metahuman identity asset.” Import it and rename the asset to your bust’s name (this is for organizational purposes only). Next, Unreal will prompt you to create or log in to your Epic Games account. It does this because Metahuman Creator links directly with Unreal Engine and Quixel Bridge, as they’re all made by Epic Games. Once logged in, MetaHuman Creator will be able to see your facial meshes. Next, go to ‘Add components from mesh’ in the top toolbar and import your model. It should show up in the project view
Next, select the “body” on the left toolbar and choose a body type that makes sense for your 3D character. For Nicola, we chose a tall, thin male body. You can change the body type later in MetaHuman Creator if you desire.
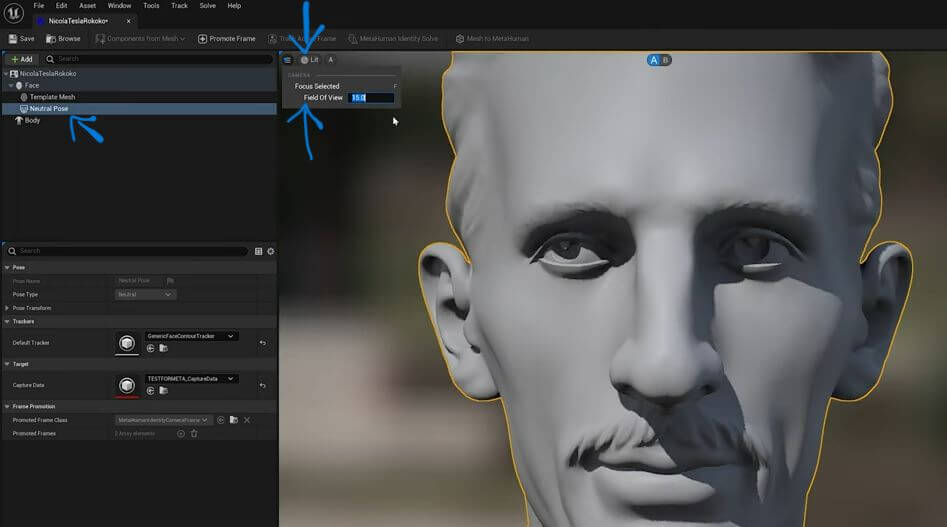
Select “Neutral pose” for your body. New body poses will be available in Metahuman, but the neutral pose is perfect for our purposes. Next, we’re adjusting this view position to aid Unreal’s facial feature tracking markers calculations. First, click on your viewport camera to change the field of view(shown below with this symbol ↓). You’ll want to set this to 15 degrees to give you a much flatter focus point for your facial features. Position your frame so the entire head’s facial features fill up the view.
Once everything is lined up, click “Promote frame” in the top toolbar. At the bottom of your viewport, it should now read “Frame zero”. If you’re struggling with this process, Unreal Engine released a great tutorial with more detail; you can follow it here. Back in the toolbar, click “Track active frame” to load default trackers for the facial features.
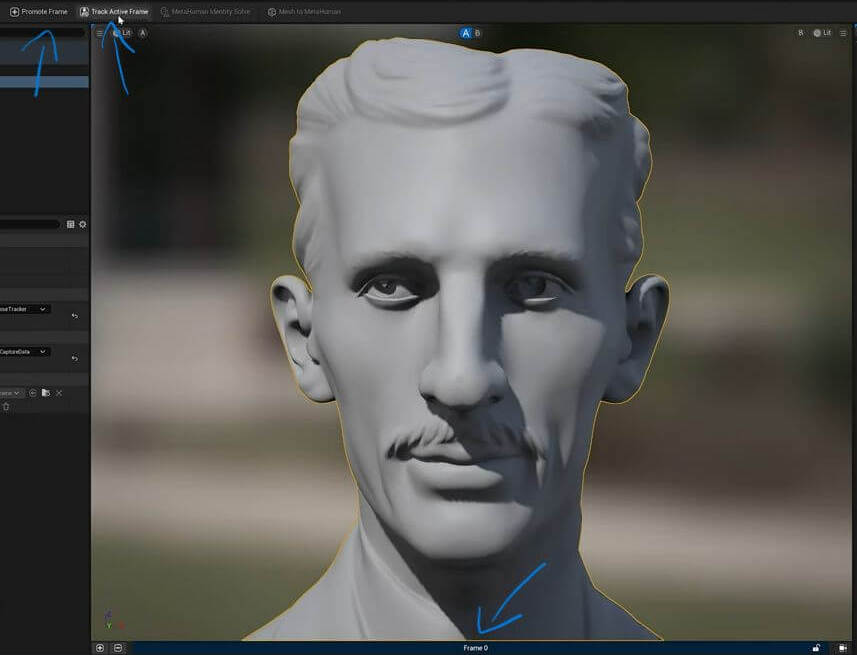
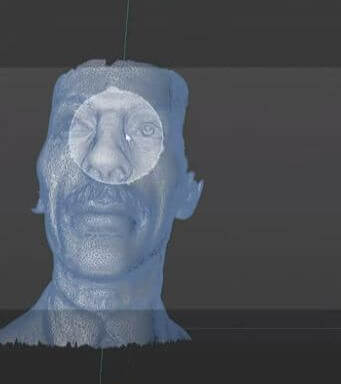
Green tracking markers should now outline your mesh’s eyes, nose, mouth, and cheek lines. You can adjust these tracking points if they are dramatically incorrect by clicking and dragging them. This process is quite resource-intensive, so you might have to move slowly. In severe cases, it’s simpler to repeat the process of choosing a frame and generating the markers. Once complete, you can also position a frame to accurately capture the shape of the ears if they are essential to your character’s visual story. When all tracking markers are placed, navigate to the top toolbar again and click “MetaHuman identity solve” to create a Metahuman mesh instantly.

If there are minor issues with your mesh, it’s quick to fix them in MetaHuman Creator itself. For example, in the image above, the hair shape has resulted in a strange horn-like deformation on the forehead. Let’s get that fixed! First, hit the “Mesh-to-metahuman” button in the toolbar, and it’ll begin setting up the creator on the backend. While that’s running, head over to your web browser and launch the latest version of Metahuman Creator. Check back to Unreal editor, and you should have a notification that your mesh is available in Quixel Bridge (Unreal’s asset management software). Back in Metahuman Creator, you should be able to open up Quixel and find your Nicola Tesla mesh. Select it and click “Enable editing”.
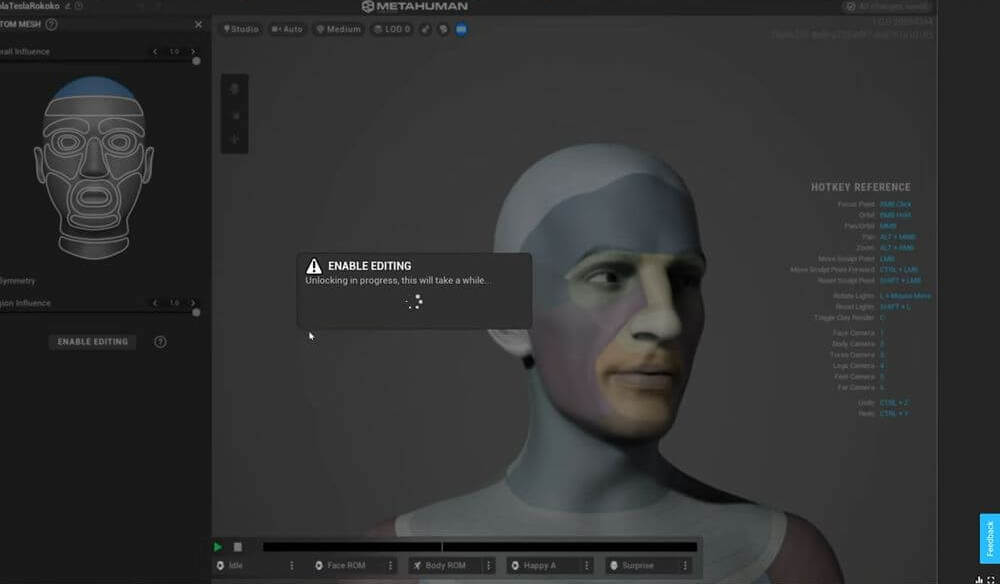
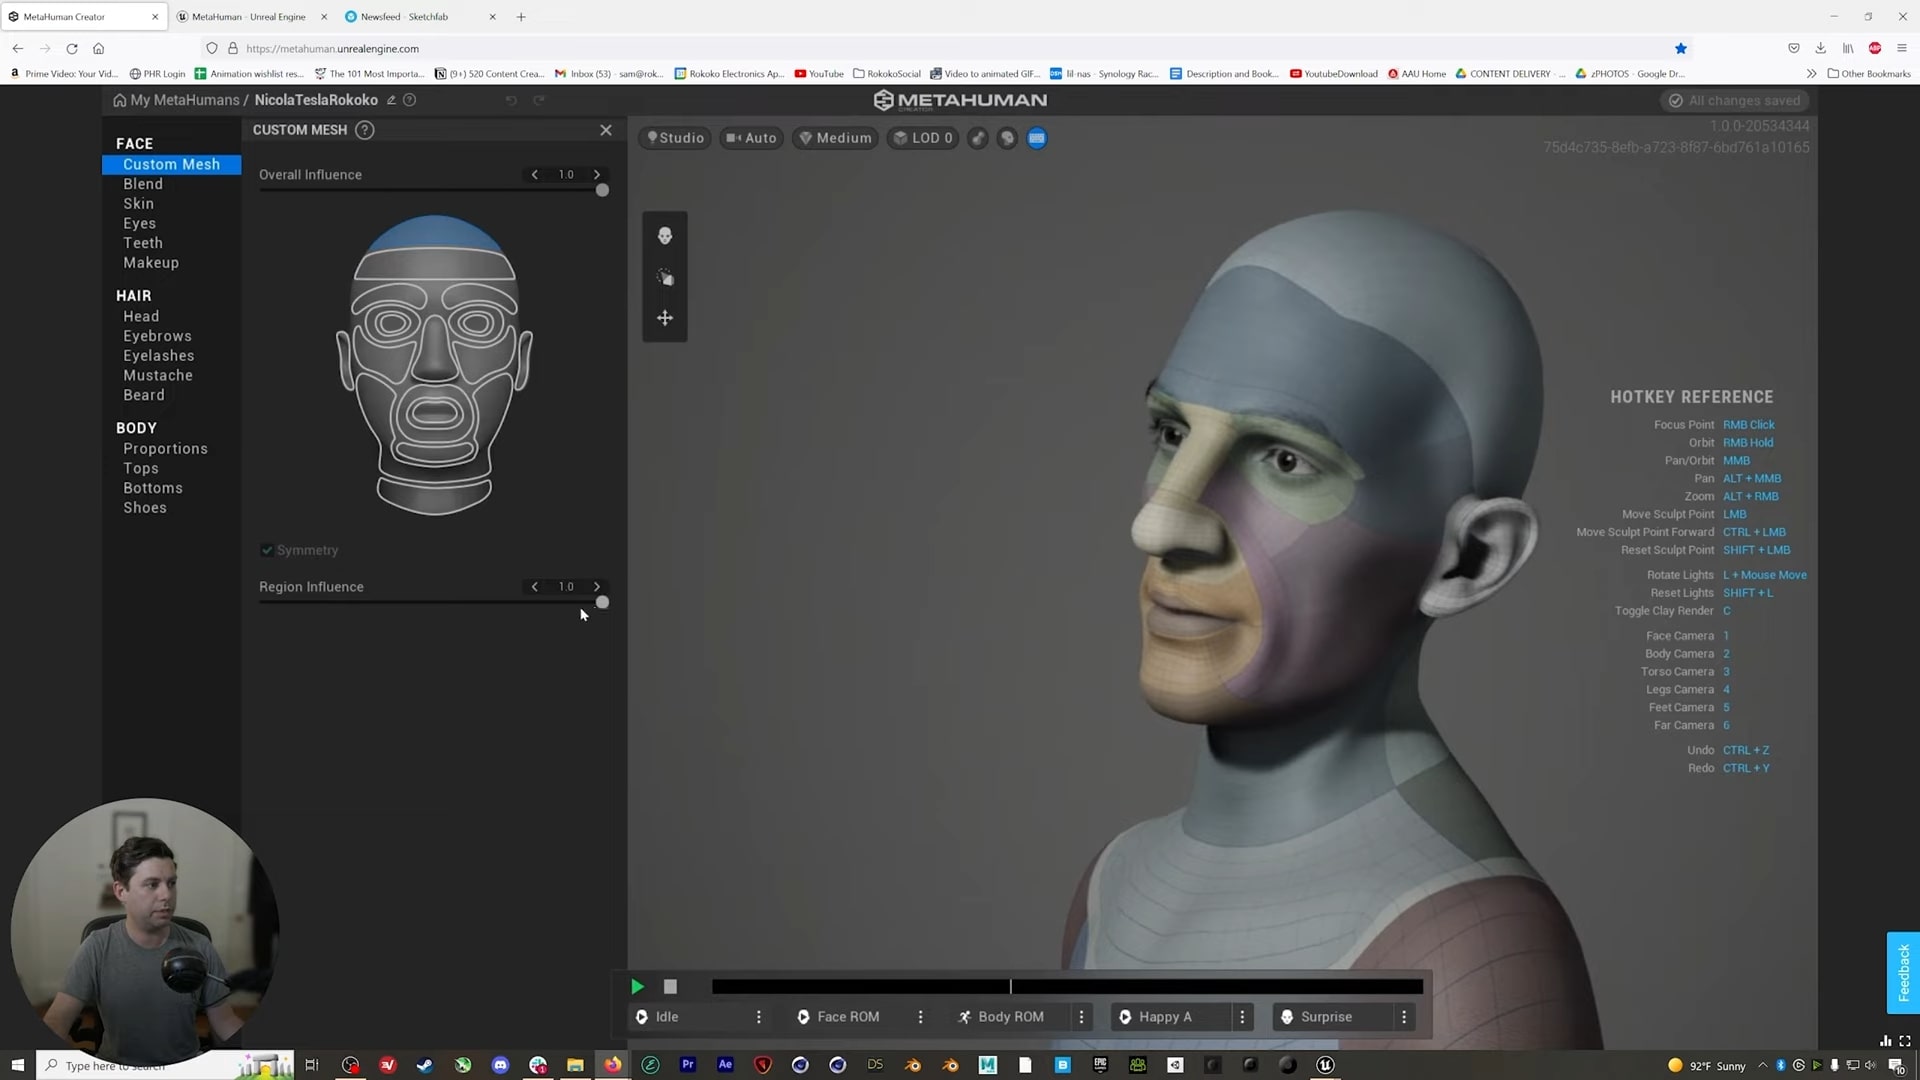
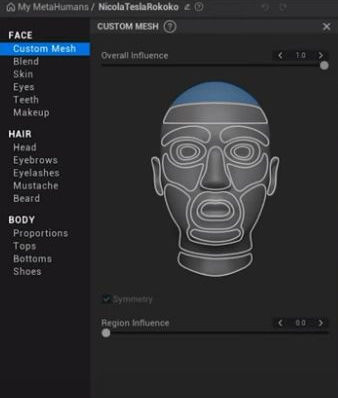
To fix that forehead bump, look at the toolbar on the left. Here we can control every single part of our Metahuman in incredible detail. First, select “Custom mesh” to open up a secondary sidebar. Here you should see a face that’s been broken down into sections. There are two sliders for each section “overall influence” and “regional influence.” These sliders indicate how much the mesh deviates from the typical metahuman shape. So to remove that strange forehead shape, just turn the influence down as you see fit, and it should disappear.
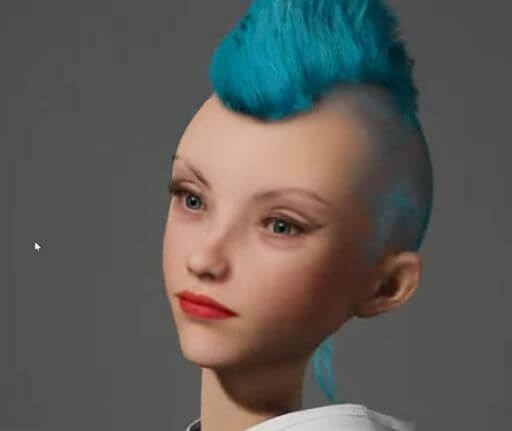
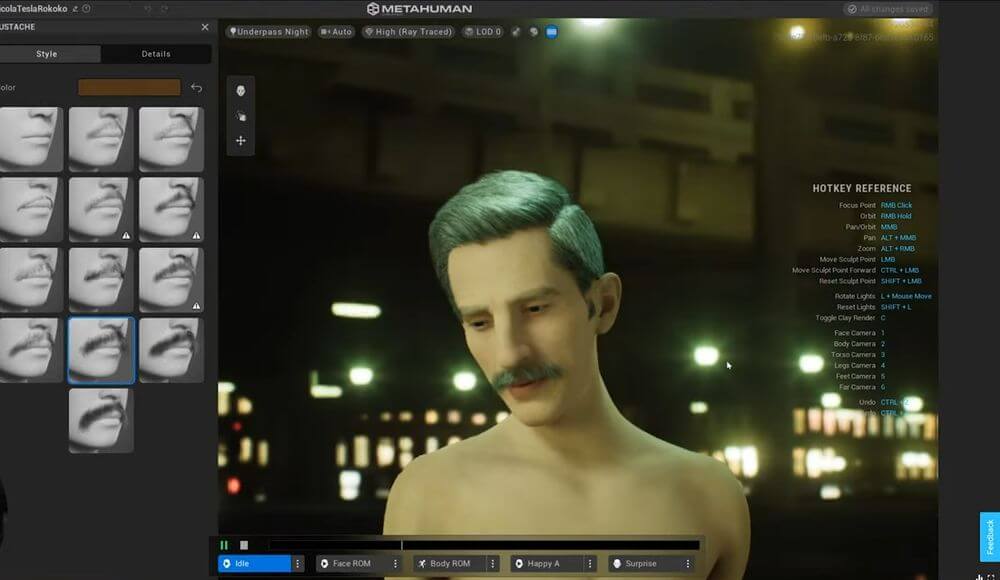
You can also adjust any facial features using this method. Next, it’s time to add some life in color to the mesh. A good starting point is to move to the “skin” tab to add a skin color and choose from the skin textures. We find the lips are often oversaturated, so we’ll go in and reduce that color to be more natural. In this step, you’ll want to start finalizing the look using all available metahuman options. Add new hairdos, change eye color, check out the additional styles of beards and otherwise play around until you’re happy. There are new clothing options, fabric patterns, and other useful new features being added frequently, so keep checking back if you’re looking for more new options.
Tip: New facial animation loops and settings are available on the bottom of your viewport.
Getting your character back into you Unreal Engine project is pretty straightforward. The character will be autosaved to Quixel every few seconds or on exit, so there’s no need to save anything. Go back to Unreal Engine, delete your old Nicola mesh and assets in the project, open Quixel, and navigate to the “My Metahuman” folder. Click “Download” to download the assets locally. This might take a while as Metahumans tend to be pretty large. Next, find your asset in the local drive and import it into your project.
How to prepare your own custom metahuman for animation
Now that your mesh is pretty much complete, there are just a few simple steps you need to take for it to work smoothly with motion capture tools. Close Unreal Engine and open up your computer’s file explorer. Navigate to the project folder that was auto-generated by Unreal Engine. Go into YourProjectName → Content folder path.
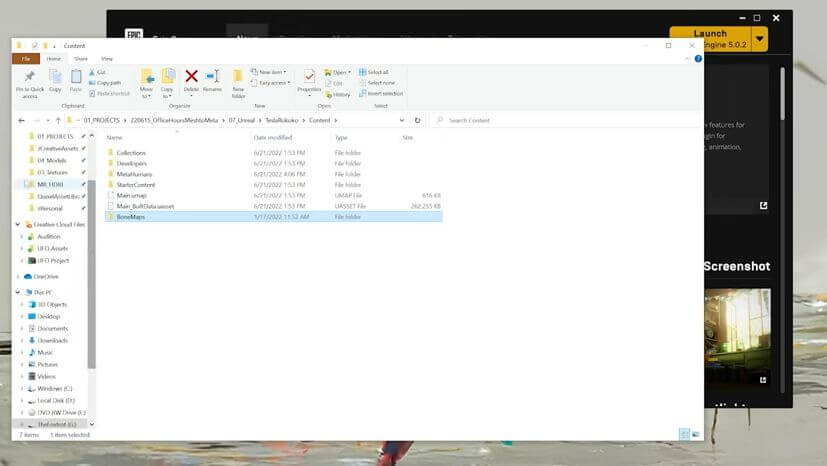
Delete the current “BoneMaps” folder and drag and drop the “BoneMaps” folder provided for this tutorial. These new bone maps can be used for animating any Metahuman with Rokoko motion capture. They’ll get you set up with a mocap rigging system and a foolproof ik rig. Next, add the provided “Mocap” folder. This folder is to correct a minor bug within the MetaHuman motion capture workflow and may not be necessary for later releases. Open Unreal Engine back up. Open up the MetaHuman Blueprint in your project files, and you’re ready to start.
Setting up mesh-to-metahumans with Rokoko motion capture
There’s no significant difference between the Rokoko Motion capture setup with characters generated via the metahuman plugin vs. created in Metahuman directly. Currently, some minor bugs exist, but they’re easy to work around. If you get stuck at any point with the animation features or setup process, feel free to reach out to Rokoko support or the community on our Discord. The tutorial below will walk you through the steps you need to take to enable body motion capture, hand motion capture, and facial motion capture using Rokoko’s tools.
Discover Rokoko’s motion capture tools
Motion capture dramatically speeds up the animation pipeline while increasing quality and freedom of movement. Along with the mesh-to-metahuman plugin, creating lifelike game characters for your ue5 projects has never been easier. Take full advantage of MetaHumans and check out Rokoko’s motion capture tools in more detail here →
Frequently asked questions


Book a personal demonstration
Schedule a free personal Zoom demo with our team, we'll show you how our mocap tools work and answer all your questions.
Product Specialists Francesco and Paulina host Zoom demos from the Copenhagen office


