
Blender Retargeting Workflow: The Ultimate Retargeting Guide
Introduction
In this comprehensive tutorial, Sam Lazarus, the creative director at Rokoko, takes us through the ultimate retargeting workflow for Blender. The process involves taking a character rigged with Mixamo, importing motion capture data from Rokoko Studio, and refining the retargeting. Sam also delves into an intriguing IK workflow using the Mixamo control rig add-on. While there are numerous retargeting workflows for Blender, this tutorial offers a straightforward approach with the added benefit of motion capture data editing.
Essential Plugins for the Workflow
Before diving into the retargeting process, it's crucial to gather the necessary plugins. The primary plugins include:
- Rokoko retargeting plugin (Free), for retargeting
- Cats Blender plugin, for correcting pose errors
- Mixamo Blender add-on, for editing motion capture
- Animation Layers add-on, for non-destructive mocap editing
These plugins are instrumental in streamlining the retargeting and editing processes within Blender.
Preparing for Retargeting
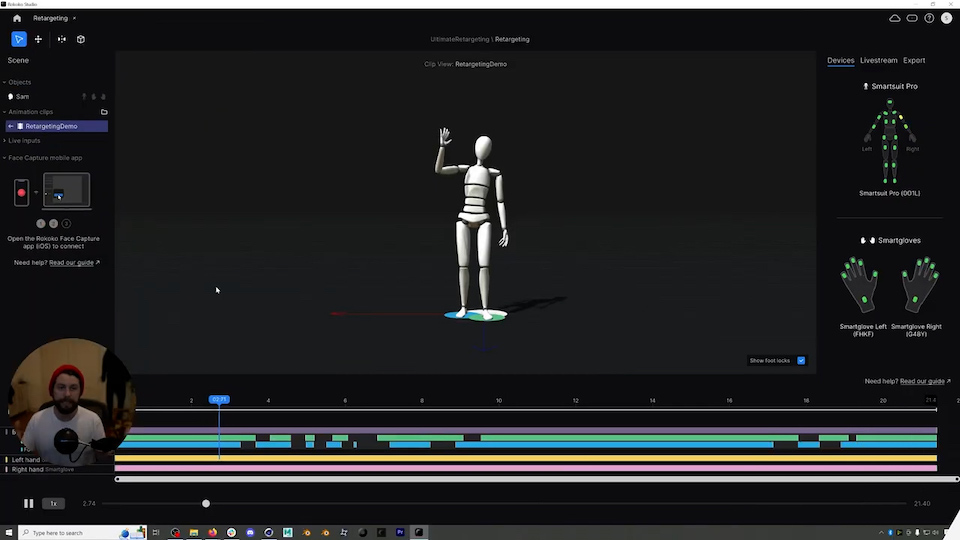
Sam begins by capturing body and hand motion in Rokoko Studio, with the Smartsuit Pro II and Smartgloves. Although he doesn't delve into the motion capture process in this tutorial, he emphasizes the importance of cleaning up the data before export. Sam demonstrates how to rename the motion capture clip and prepare it for export as an FBX file.
Character Rigging and Import
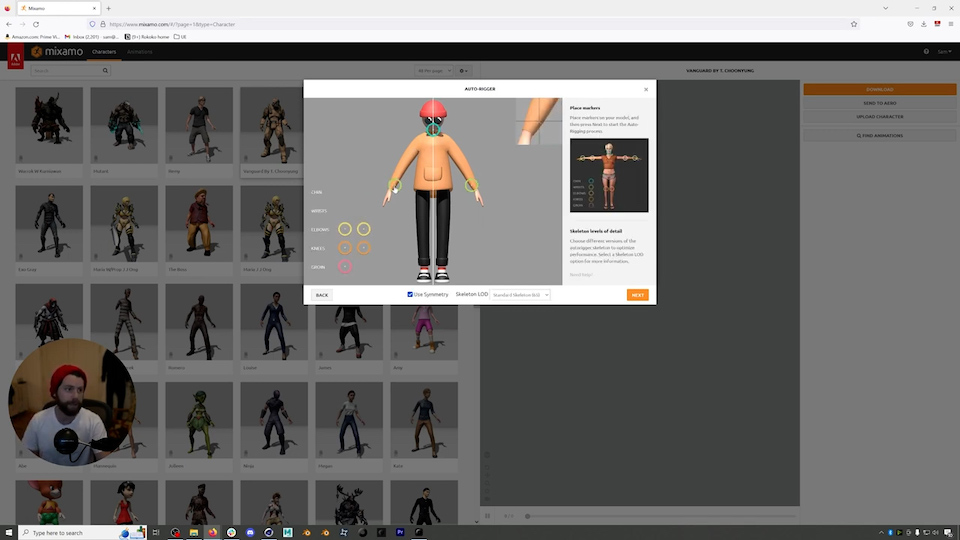
To ensure a smooth retargeting process, it's essential to rig the character in Mixamo in an A-pose. Sam briefly discusses the character rigging process. Upon exporting the character as an FBX file, it's crucial to select the "Mixamo" preset and ensure the export is in binary format for compatibility with Blender.
Initial Character Pose Adjustment
When importing the character into Blender, Sam advises enabling the "Automatic Bone Orientation" option under Armature. He emphasizes the need to match the character's initial pose (frame zero) with Rokoko's T-pose. Sam highlights the importance of aligning the character's feet under the hips for better results. He recommends using the Cat Blender plugin for pose adjustments.

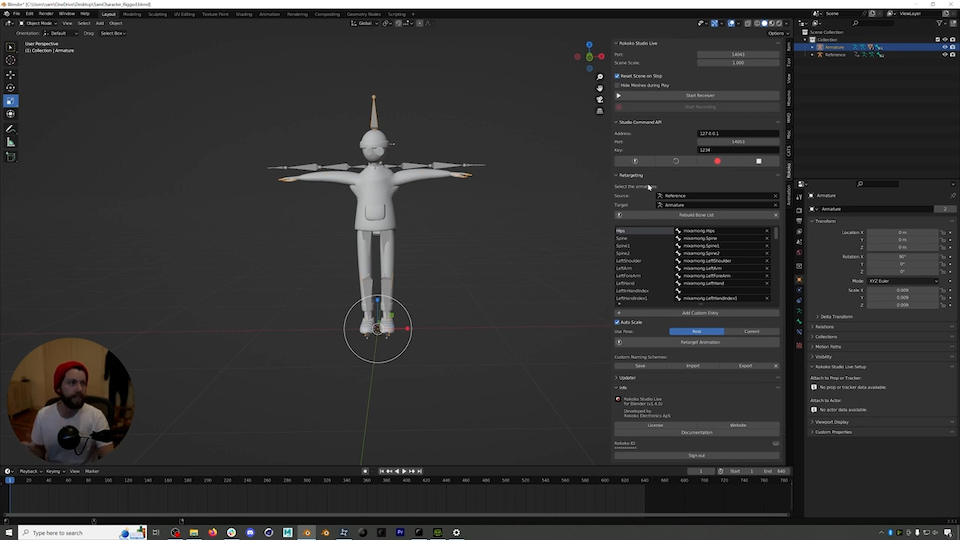
Rokoko Retargeting Plugin
The Rokoko retargeting plugin for Blender plays a pivotal role in connecting motion capture data with the character's skeleton. Sam demonstrates how to assign Rokoko's motion capture bones to the character's bones manually. This step ensures a precise mapping between the mocap and character skeleton.
Motion Capture Import and Adjustment
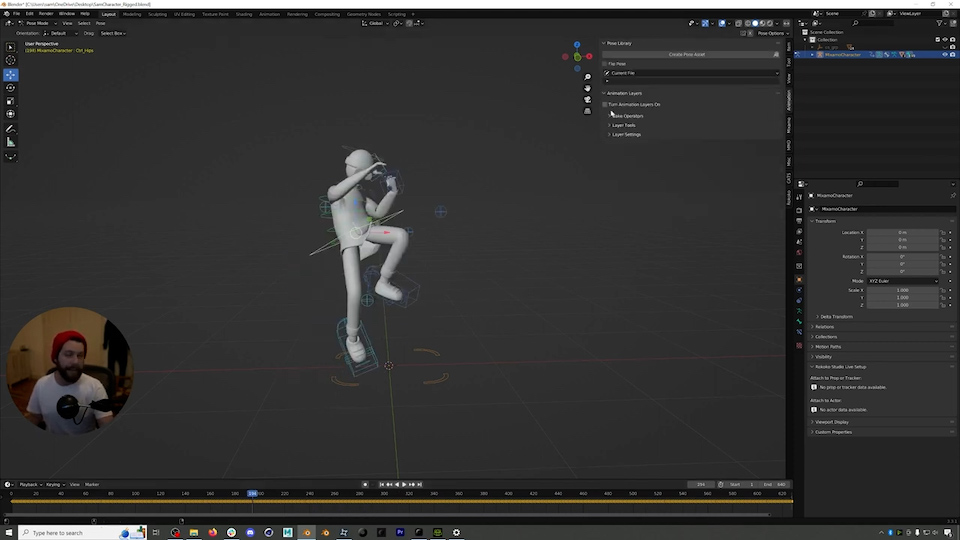
After setting up the retargeting, Sam imports the motion capture data into Blender. He explains the need to match the motion capture with the character's rig. While the initial retargeting results may look promising, Sam acknowledges that further adjustments are often necessary.
Advanced Motion Capture Editing with IK Control Rig
In the final section of the tutorial, Sam introduces the Mixamo control rig add-on. This powerful tool simplifies motion capture editing by providing an IK control rig for the character. Sam showcases how easy it is to fine-tune motion capture data using the IK control rig. He also mentions the Animation Layers add-on, which allows non-destructive editing of motion capture animations.
Conclusion
Sam Lazarus's tutorial offers a comprehensive guide to retargeting motion capture data in Blender, from character rigging to advanced editing with IK control rigs. While this workflow may not be the only option available, it provides a practical and effective approach to achieve accurate retargeting and animation editing. Blender users seeking to optimize their motion capture workflow will find this tutorial valuable.
Frequently asked questions
Read more inspiring stories


Book a personal demonstration
Schedule a free personal Zoom demo with our team, we'll show you how our mocap tools work and answer all your questions.
Product Specialists Francesco and Paulina host Zoom demos from the Copenhagen office


