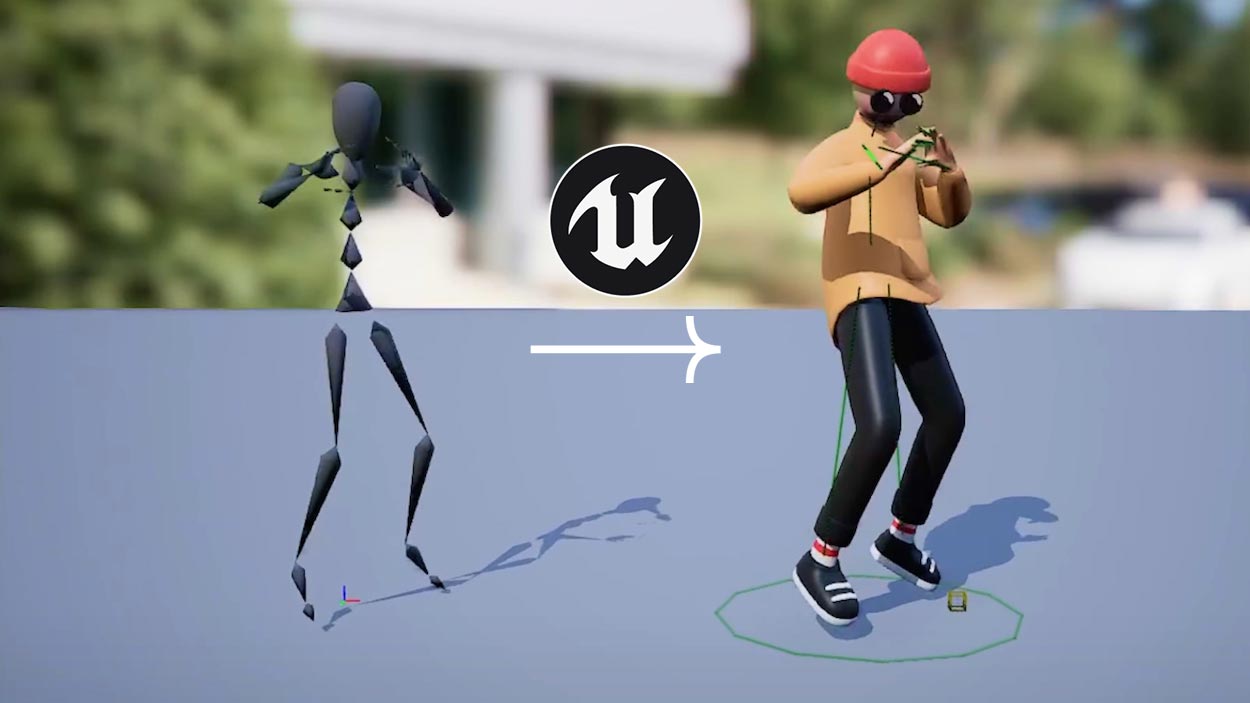
Retargeting made easy in Unreal: The Ultimate Retargeting Guide
Introduction
In the tutorial we delve into the world of motion capture retargeting in Unreal Engine. The tutorial is geared towards those interested in the process of retargeting motion capture data onto rigged characters within Unreal Engine. We'll steer clear of metahumans in this tutorial as they come with their own unique considerations not covered here (read here instead, or go to the Rokoko Youtube channel to see metahuman related tutorials). It's worth noting that Unreal Engine is indeed capable of motion capture retargeting, though it's not its primary focus. More specialized software like Maya or Blender may be better suited for this task. Nonetheless, our aim is to provide a comprehensive guide to motion capture retargeting, including tidying up and refining the mocap data.
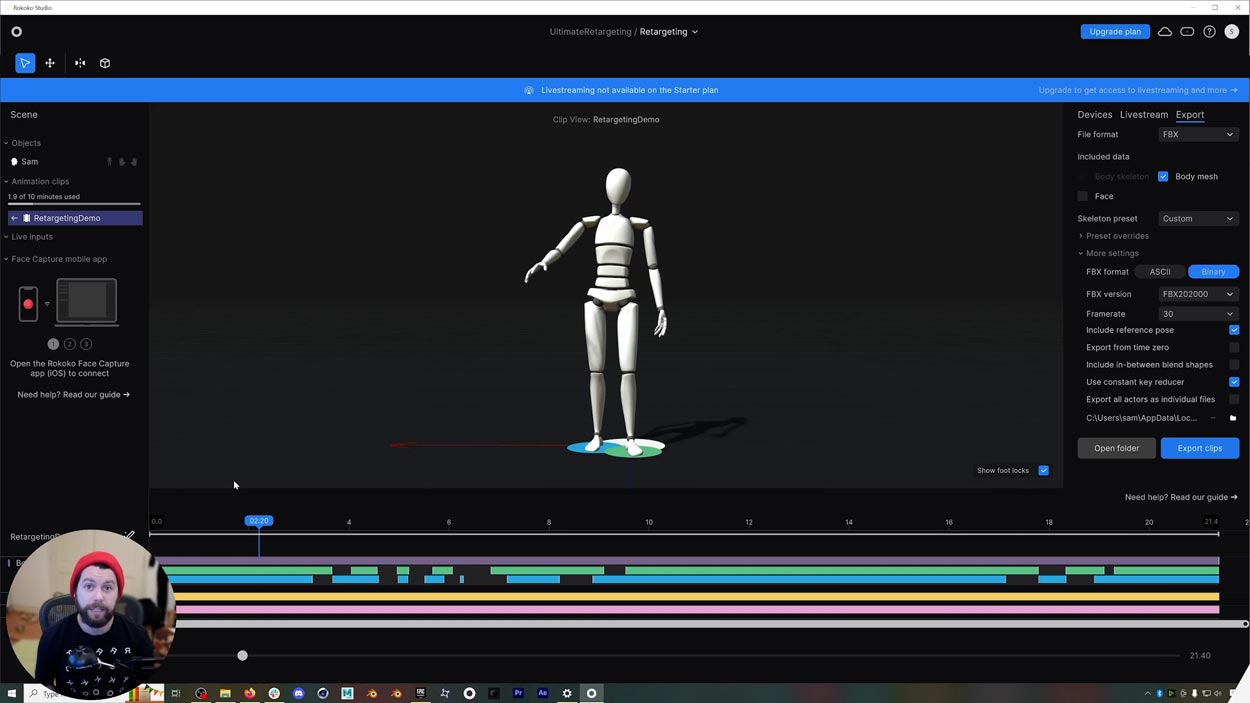
Preparation of Motion Capture Data (Rokoko Studio)
Our journey begins in Rokoko Studio, the platform where we've recorded our motion capture data, using the Smartsuit Pro II and Smartgloves. While we won't go into the specifics of capturing mocap in this tutorial, rest assured that there are tutorials available for that purpose. We'll showcase the mocap data we've captured, highlighting common issues that arise in inertial motion capture, such as imperfect hand contact. An essential point to remember is that mocap data should be exported without an attached mesh.
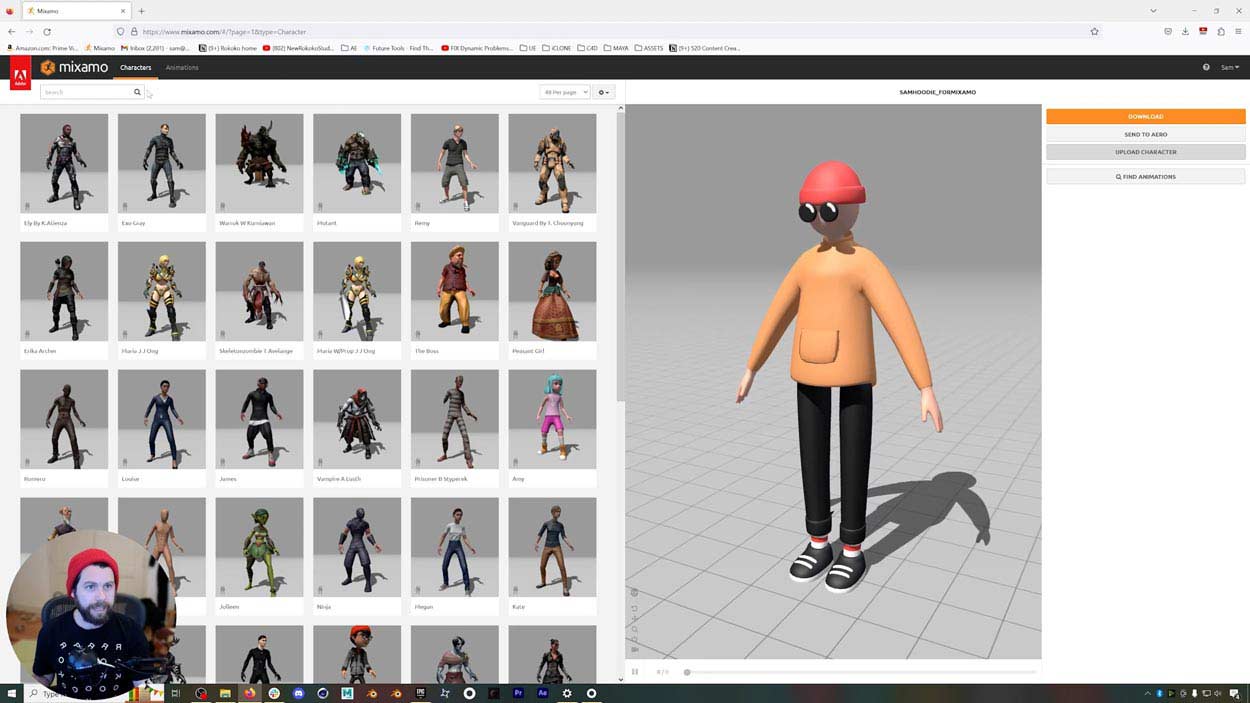
Character Preparation (Mixamo)
This segment focuses on preparing the character. It's essential to understand that this workflow isn't exclusive to Mixamo characters; it's adaptable for any rigged character. The key steps involve selecting a skeleton preset (Mixamo, in our case), ensuring the character assumes a T-pose, and subsequently exporting it for integration into Unreal Engine. Additionally, this workflow is compatible with both Unreal Engine 5.0 and 5.1.
Importing into Unreal Engine
Our journey transitions into Unreal Engine, where we create a project, establish folder structures, and import both the mocap data and the character. It's crucial to ensure that the skeletal mesh field remains empty during import, and animations are included. This phase sets the stage for the retargeting process within Unreal Engine.
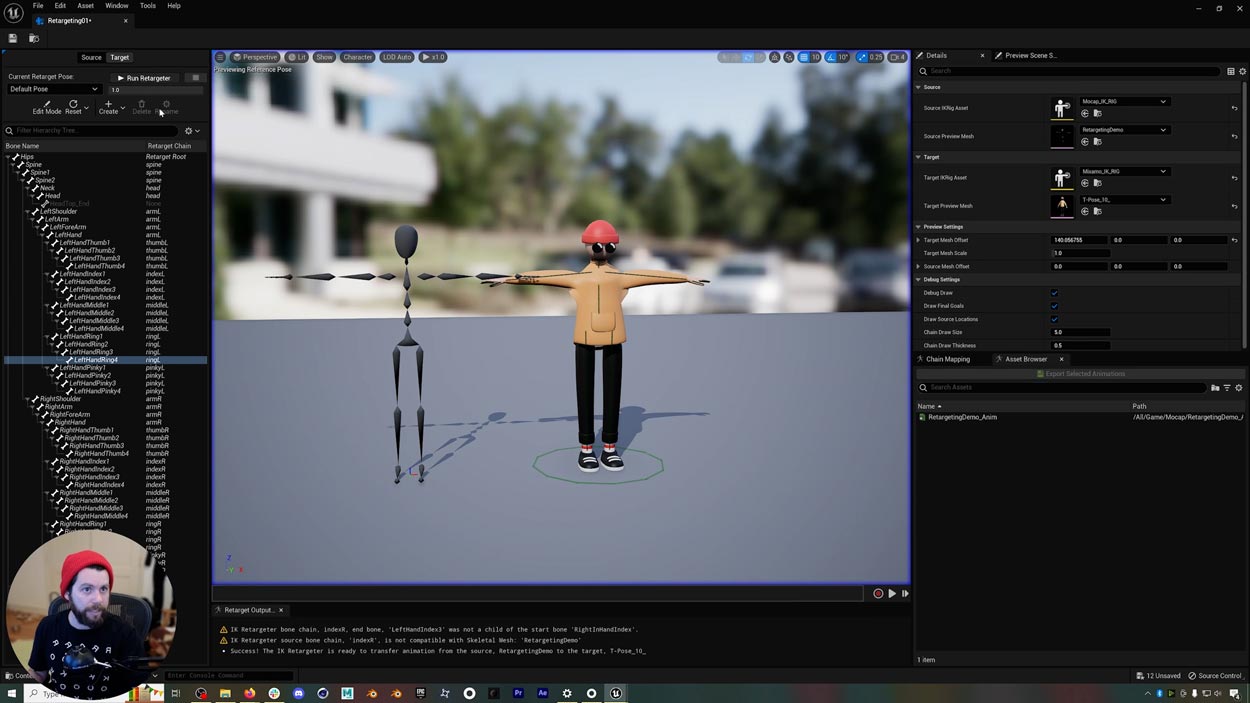
IK Retargeting Setup
The core of our tutorial revolves around the setup of IK (Inverse Kinematics) retargeting. We emphasize the importance of creating an IK rig for both the mocap data and the character. This process involves configuring retarget roots and crafting IK chains for various body parts, including the head, spine, arms, and legs. To expedite the process, we demonstrate how to mirror the IK chains for symmetrical alignment on the character.
{{cta}}
Initial Retargeting
Once the IK rig is established, we proceed to initiate the retargeting process. Here, we create an IK retargeter asset, linking the mocap skeleton as the source and the character skeleton as the target. This synchronization ensures proper alignment of both skeletons in a T-pose.
Fine-Tuning with IK Handles
This section introduces the concept of IK handles, offering precise control over the retargeting process. We demonstrate how to add IK goals for specific body parts, particularly the hands. Additionally, we stress the importance of maintaining the correct T-pose for both the mocap and character skeletons, addressing issues like thumb alignment as they arise.
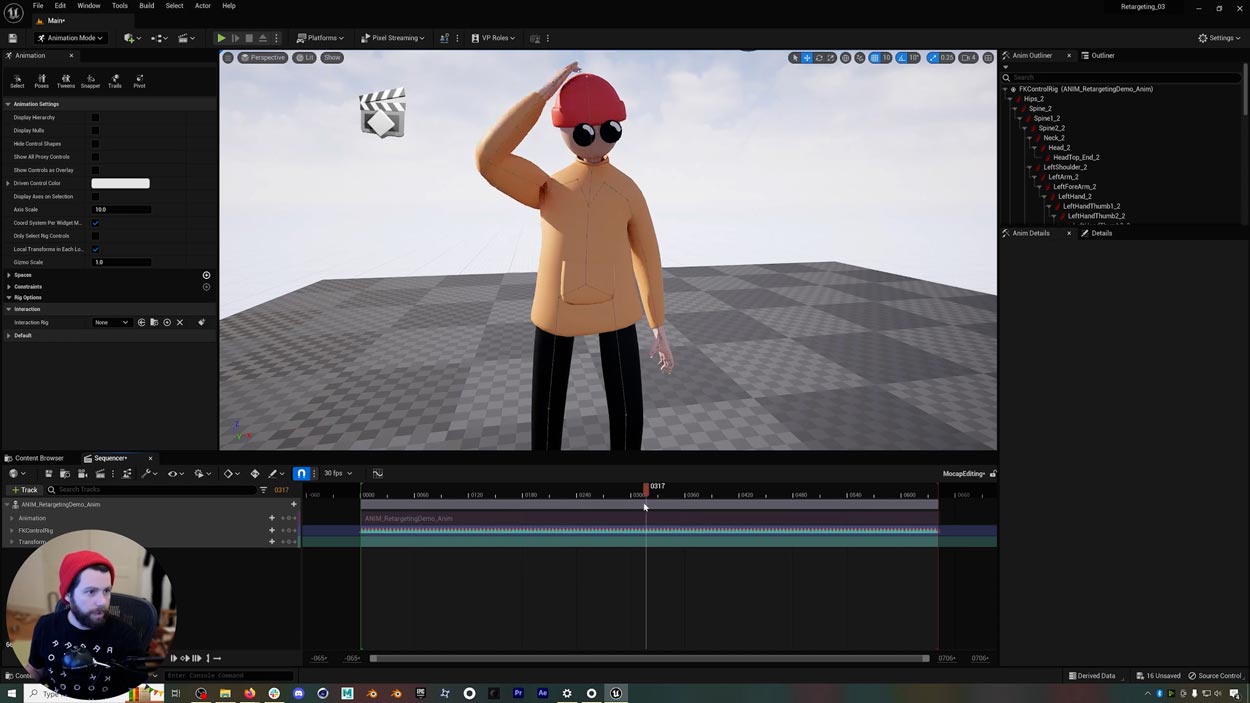
Mocap Cleanup in Sequencer
The tutorial concludes by showcasing the use of Unreal Engine's Sequencer for mocap cleanup. We import the animation, explore additive animation layers, and provide insights on adjusting keyframes for refining the animation further.
Conclusion
The tutorial will equip you with a comprehensive understanding of motion capture retargeting within Unreal Engine, specifically for rigged characters. It covers crucial phases, such as mocap data preparation, character setup, IK retargeting, and the meticulous use of IK handles. Additionally, it introduces techniques for cleaning up mocap data using Unreal Engine's Sequencer. While acknowledging that Unreal Engine's primary focus isn't motion capture, this tutorial empowers viewers with valuable knowledge for achieving successful retargeting and animation refinement within the Unreal Engine environment.
Frequently asked questions
Read more inspiring stories


.jpg)
.jpeg)

Book a personal demonstration
Schedule a free personal Zoom demo with our team, we'll show you how our mocap tools work and answer all your questions.
Product Specialists Francesco and Paulina host Zoom demos from the Copenhagen office


