Previously, if your actor climbed a staircase, your 3D rig would remain treading in place on the ground, creating some strange-looking animation! But with the new release of Rokoko Studio Beta, climbing that staircase should produce mocap animation precisely as you’d hope. Elevation tracking in motion capture is the next step in providing total freedom of movement when tracking motion. It allows you to capture when your 3D character not only needs to move on the X and Y plane but also on the Z plane. This article will give a bit of an overview of mocap elevation tracking, plus some more detailed tutorials on how to do it with minimal errors.
How was elevation tracking done previously?
The short answer is; that it wasn’t. There were a few ways of hacking together a vertical tracking solution, but they all required excessive editing. High-end optical motion capture systems also provide elevation tracking with base stations, but they need plenty of manual editing. Rokoko Studio Beta and the Rokoko Smartsuit Pro II, released in 2022, have come a long way in developing multi-level tracking. By following the tutorial below, you’ll find recording motion capture of a character walking upstairs is no longer a headache.
Why is elevation tracking so exciting for 3D artists?
Any 3D artist knows that if they want to animate characters, they’re in for a lot of work and time. Motion capture tools can significantly speed up your entire animation workflow. With the improvement of your trackable range of motion, you can now create a richer movement for characters in less time. For example, high-impact tracking where a CG character jumps and lands dramatically is now as simple to record as a walk cycle.
How to do elevation tracking with Rokoko’s mocap tools
Editor's note: This tutorial won’t work with optical systems or another brand of motion capture suit. Specifically, you’ll need to have a Rokoko Smartsuit Pro II available and the Rokoko Studio Beta for this tutorial to work. First, here are some quick tips you should keep in mind:
- Always try to record elevation data on a solid, immoveable surface to reduce the time you spend editing.
- Set your step height to the actual height of your physical prop/step’s next level to achieve more accurate captures.
- As elevation tracking features are currently in beta, they currently work best if your steps are uniform in height.
The following tutorial can also be found in video format here.
Step 1: Install & Open Rokoko Studio Beta
You can find the free download of Rokoko Studio Beta here. Open Rokoko Studio Beta, create a new project and create a new scene.
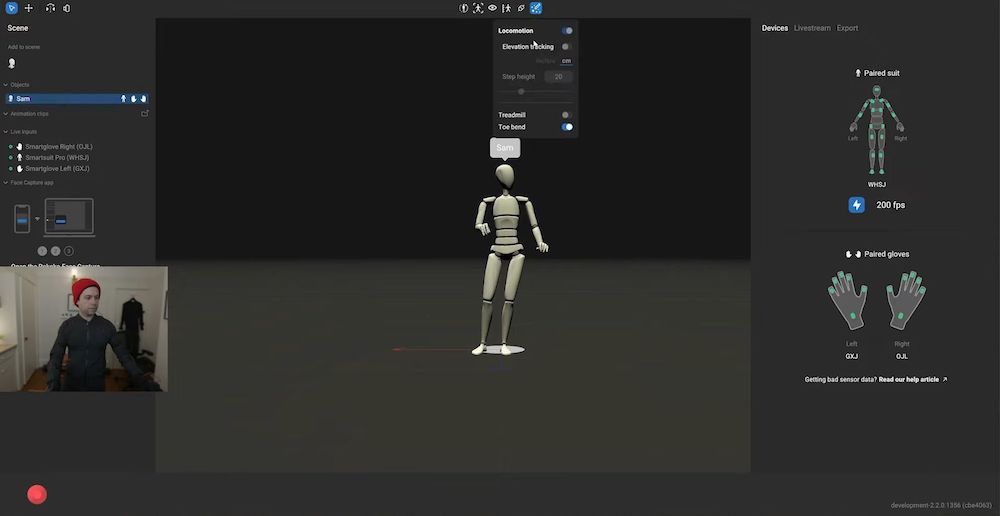
Step 2: Turn on your Rokoko tools and set up your scene.
Elevation tracking requires a standard setup. Plug your Rokoko Smartgloves into your portable USB-c battery, turn on your suit and add a new actor to the scene. Set your color and height, and calibrate in a straight pose. You should have instantaneous feedback and be able to watch your 3D armature mimic you (or your actor) in real-time.
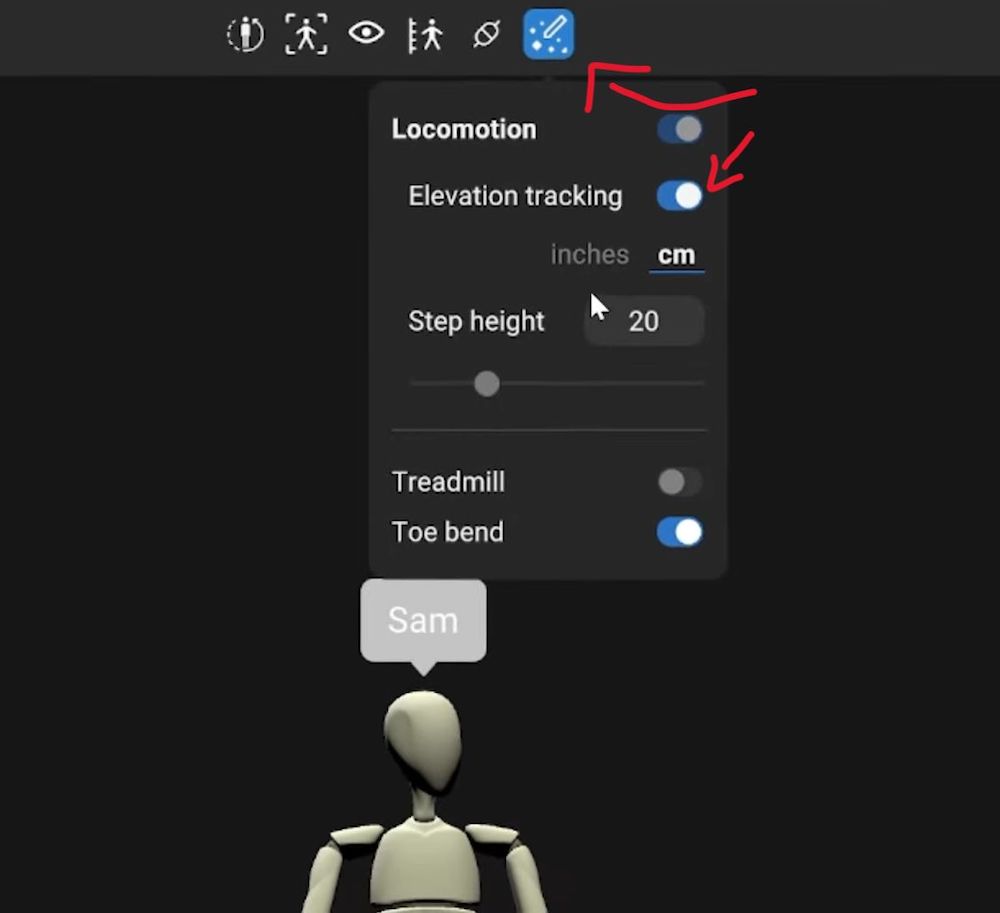
Step 3: Enable elevation tracking
With your actor object selected in the left panel, click the little wand icon on the top toolbar. Under “Locomotion,” you should see some options for elevation tracking:
- Step height
- Treadmill
- Toe bend
To get good data quality, this step height should be as close as possible to the actual height of your physical objects.
Having a regular shared height for the objects you'll be stepping on is ideal. If the objects have varying heights, you can always adjust the elevation tracking step height after the motion’s been recorded. In fact, you don’t even have to have elevation tracking turned on when you’re first recording because you can turn it on after recording when you’re editing.
Step 4: Record your animation clip
Hit record and record your animation clip. Ideally, you’ll want to be stepping on something rock solid and hard. This provides the cleanest animation data. But an animator's life is rarely so convenient! In this tutorial, our actor is stepping on a soft little poof chair, so you can see the foot slipping a bit on the step. We can fix this when we’re editing. So go ahead and hit record on your step up. Once recorded, move onto Step 5 to begin editing.
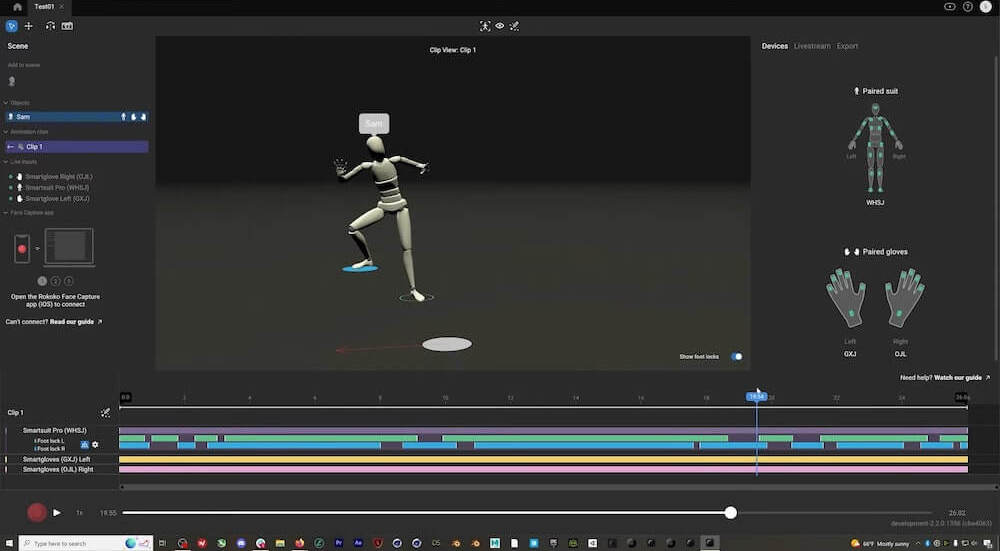
Step 5: Edit your foot tracking when climbing up the stairs
Ready to fix that wobble? Just like when we’re tracking normal locomotion with Rokoko, elevation tracking works by tracking your foot contact with the ground. The blue and green bars in your recording timeline indicate at which point either foot was in contact with the ground.

You can visualize this in your scene by toggling on ‘Show foot locks’ in the right-hand corner of your viewport. Now we can easily adjust our feet to snap to the ground where appropriate simply by dragging the green or blue bars.
Step 6: Edit your foot motion when climbing down the stairs
As your character climbs down elevations, the tracking system can sometimes get confused about which elevation you’re currently standing on. If there’s a contact placed in error, all you need to do is delete that portion of the colored bar.
If something is not working (i,e your foot isn’t going up or down as it should), go in and edit the step height. Changing that around can be precisely what the algorithm* needs to output the correct movement.
*Rokoko Studio Beta is in active development and locomotion accuracy updates will be released continuously.
Step 7: Export your animation to a CG software of your choice
Head into Autodesk Maya or a similar program and retarget your animation data as usual. If you don’t know how to do this, look at one of our software-specific tutorials or plugins.
Step 8: Complete your scene
With your character climbing steps like a pro, you’re free to get back to other tasks! Add in lighting, and textures for a cinematic piece, or turn your animation into a loop for use in your latest game development project.
Learn more about Rokoko’s motion capture tools
Rokoko’s motion capture solutions offer the most value in their class and are a great tool for independent creators. Ready to take your characters into the outside world? We have dozens of tools to assist you with all things animation and motion capture. Learn more about Rokoko’s Smartsuit Pro II.
Frequently asked questions

.jpg)


Book a personal demonstration
Schedule a free personal Zoom demo with our team, we'll show you how our mocap tools work and answer all your questions.
Product Specialists Francesco and Paulina host Zoom demos from the Copenhagen office


