
Beginner’s Ultimate Guide: How To Get Started With 3D Animation (+2 free tools)
It’s no wonder that you want to get started with 3D animation. It’s used in almost every game, movie, music video, series, and yes, even corporate explainer videos. And getting paid to create the next Avengers, God of War, or award-winning 3D Anime… Well, that’s this nerd’s (and every nerd’s) dream job. When I first stumbled into a 3D animation class, I didn’t know what to expect. And quite frankly, it was overwhelming. In this blog post, you’ll learn what animation is about, the different jobs and roles in 3D animation, what free tools exist, the kind of hardware you need, and how to get into 3D animation as a career (spoiler: You don’t have to study for 3+ years). Let’s dive in!
Animators are artists - but you don’t need excellent drawing skills to get into 3D animation

Here’s a well-known secret in the industry that beginners get completely wrong almost every time - you don’t need to draw well. Yes, that’s right, zero drawing skills are required for some 3D animation jobs (of course, some do require them). When studying animation, only 30% of the people there came in being able to draw well. About 20% of the remaining group learned to draw as they became more interested in specific fields, while the other half of the class focused on the more technical aspects of animation. A 3D production needs all types of people and specialties. Don’t give in to the fear that you “don’t have enough creativity” or “can’t draw” or “didn’t do fine art”. Trust me; there’s space for you!
With that said, some attributes will serve you well:
- Technical proficiency in computers. You’ll be working across a myriad of programs and applications - bouncing from Photoshop to Blender, to ZBrush to AfterEffects is common when you’re learning.
- The ability to think in 3D space is one that I found tricky at first, but it’s vital to a good modeling and animation skillset. To practice, try imagining a cube in your head, then slowly spin it around. Can you see the corners? The perspective? Try sketching it out. Little mental exercises like this will take you far.
- Communication skills and a calm temperament serve you in almost every career. Yes, you can hide behind the screen and spend most of your time making cool stuff, but you still have to work in a team. Being open, respectful, and honest will manage any anxiety better than hiding your true feelings.
- Understanding the mechanics of movement is vital to every aspect of 3D character animation. Always be curious about how things work.
What does the process look like for a production that includes 3D animation?
An animation studio is a machine made up of many moving parts. The film production pipeline can be broken down into three large groups:
Pre-production
Pre-production is when the planning happens, this involves scriptwriting, storyboarding, and visual development. Pre-production develops a “roadmap” for the entire project. As a 3D animator, you’ll be tasked with modeling the first versions of characters and sets. In big productions, 3D animators also create previsualizations of certain scenes.
Production
Production is when the heavy lifting for 3D animators kicks off. In fully animated films, the focus is on character modeling, rigging, effects such as hair, lighting, texturing, and animation.
For projects that are mostly live-action (for example, superhero movies), the production consists of on-set work. Animators will work to block out complex scenes with motion capture and set all the camera angles needed to capture shots. Indie artists doing the bulk of the production work themselves can of course always set up in the comfort of their home thanks to mobile mocap suits like the Smartsuit Pro.

Post-production
In fully animated projects, post-production consists of rendering (sometimes included production), editing, compositing, audio and soundtrack, and titles. For live-action projects, the majority of an animator’s work occurs in post-production. Once the edit is complete, the shots requiring animation or VFX will be sent to the relevant department. As the shots are completed, they get rendered and compiled into the final product.
Your step-by-step guide to getting started as a 3D animator

Ready to make things move?! Hold up, there’s a bunch of work that needs to get done first. What we casually refer to as “animation” is a lot more complex than you first think. When someone says, “I work in 3D animation,” they really mean “I’m part of the 3D animation process”. Not every 3D animator actually animates. Here are some of the non-animation roles you commonly hear about:
- Character modeler
- Asset modeler (every rock, hairbrush, and tabletop has to be created
- Texture artist (adding color and detail to the model)
- Texture mapping (actually applying texture to the model)
- Lighting artist
- Layout artist
- Background artist
- Cleanup artist
- Rendering artist
- Rigging artist
- Pipeline technical director (also called RnD)
- Camera/Layout artist
- Compositor
- CG Supervisor
- The list goes on… Check out this article for more detail.
For simplicity, the following steps assume you’ll be working on a fully 3D project. These are the basic steps you need to follow to create a complete shot, scene, or film.
Step #1: Asset Modeling
It’s obvious once someone tells you, but remember that nothing exists in the 3D world. Do you want your character to pick up a ball? Well, you have to model that ball, texture it, move it, etc. Asset modelling requires attention to detail and the ability to create fast. They are particularly focused on making assets as ‘light’ as possible to keep rendering times reasonable.
Step #2: Character Modeling

Modeling a character is a little more in-depth than asset modeling. You need a strong understanding of the muscular structure and what lies underneath the skin. Most 3D modeling artists are strong at complementary skills like sculpture, drawing, and sketching, but it’s not required to excel. In most cases, a concept artist will draw a character model sheet for you to use.
Step #3: Texturing
Texturing is the process of applying color and texture to a character. The same person usually completes this process. Texture artists use programs like ZBrush to add incredibly intricate details. From pores to the ribbed texture in dragon horns, these artists are the first to bring a touch of realism to your 3D world.
Step #4: Rigging
Rigging is one of the most technical points of 3D animation. Many people who consider themselves more technical than creative become riggers. A rig is like the skeleton of a 3D model (both for characters and anything else that moves). Rigging artists often need coding skills to create more complex skeletal systems. There are two main methods of rigging: Inverse Kinematics (IK) and Forward Kinematics (FK). The different methods make a big difference to actual animation calculations.
Inverse Kinematics
Inverse Kinematics is all about prediction, like when you want to pick up a glass of water, you look at the glass as the target, then your brain handles all the motions required throughout the arm for the hand to reach the glass. It is called Inverse Kinematics because the operation is backward - the target is the glass, and the animation is driven from the target.It’s rare for characters to use IK entirely as it limits the control you have over fine motions. However, IK is perfect for robotics and mechanical movements.
Forward Kinematics
Forward Kinematics are the other way around, propagating the motion of each joint in the skeleton, relative to the previous joint. This is similar to a robot arm, where the motion of each joint is calculated individually. FK allows for much more precise control and is perfect for retaining high-fidelity animation (including data you receive from mocap).
Step #5: Layout & Cameras

A layout artist is responsible for “setting the stage.” In other words, they place all characters and objects for the shot exactly where they need to be. For example, if you have one background for a scene but different camera angles for each shot, the layout artist will create the starting point for the animator to work with. Layout artists might also give cameras rudimentary movement to help animators move characters appropriately. Layout artists ensure two things:
- Excellent cinematography
- Consistency across shots and environments
Step #6: Animating
Finally! We get to make stuff move! Animation is one of the most complex parts of the 3D animation process (duh), so it’s best to think of it in three easy but powerful steps.
Blocking
Blocking is when you roughly animate your character to the movements that you’re imagining. It can quickly give you a sense of what’s required to complete the shot and if there’s anything unrealistic. To block out motion, animators use three methods.
- Straight ahead animation which uses keyframes is the easiest way to start animating.
- Filming themselves performing the motions as reference and using keyframe animation thereafter.
- Motion capture suits that capture movement yield the fastest and most accurate blocking motion.
Refining
Animators will use their blocked-out motions either as a base or as a reference for the final, more refined output. For complex scenes and characters, it’s common to hire a professional mocap actor and refine their movement once applied to the 3D model.
Step #7: Lighting

Now we have a scene; it’s time to bring in the lights! Most lighting setups use a simple 3-point lighting system as a quick start.
Small lights are added as needed to make objects pop or lighten dark shadows. While lights can be different colors and intensities, it’s important to remember that light interacts with its environment. Light can bounce through objects (imagine a torch shining through your hand) or reflect sharply off metals and glass. For this reason, the lighting artist and texture artist might work together to find a happy medium between realism and what looks good. While raytracing and lots of bounce lighting can promote realism, it will also affect the render times significantly.
Step #8: Fluid Effects & Animation
Fluid FX and animation refers to anything that you could consider ‘flowy.’ Fluid effects include:
- Hair
- Clothing
- Fire
- Water
- Dust particles
- Snow
- Grass blowing in the wind
A 3D FX artist usually has good technical skills that include coding and mathematical calculation to animate these effects.
Step #9: Rendering

Rendering is one of the most underappreciated skills out there! Once your animation is ready to be exported, you need to “render it.” Rendering is the process of your computer calculating all the lights, textures, animations, and camera movements into one playable movie file. In 1995, it took Pixar anywhere between 45 minutes to 30 hours to render one frame (with 25 frames in a second). As of 2019, Pixar could have rendered the original film in less than 70 minutes. But animation has evolved with technology. Toy Story 4 took up to 160 hours to render a single frame due to the complexity of the calculations.
More detail on rendering
At its core, rendering is really about algorithms determining the colors of each pixel on the screen. This is why the process of lighting a scene should be done with consideration to rendering times, as the more elements involved in the coloring of each pixel, the higher the number of calculations have to be made before arriving at the desired color value for that pixel. These calculations are primarily performed by shaders (which are defined by texture artists). A shader for glass, for example, considers what elements are rendered behind the glass. Then only tints that color to look like it’s behind the glass.
Step #10: Editing, Compositing, and Post

So you’ve rendered out your shots, but now you need to composite them into an actual watchable sequence. To do that you need a VFX artist or a compositor to pull it all together, add the music and audio, and make magic happen. This process falls outside of the traditional scope of 3D animation but is an integral part of any production (especially live action).
Editor’s note: In-game animation skips the rendering and compositing steps but requires additional steps to map commands to character movements and events.
What free 3D animation tools do I use as a beginner?
Here’s the good news; there are plenty of free or freemium 3D animation tools available. Most premium tools also offer trials and student discounts.
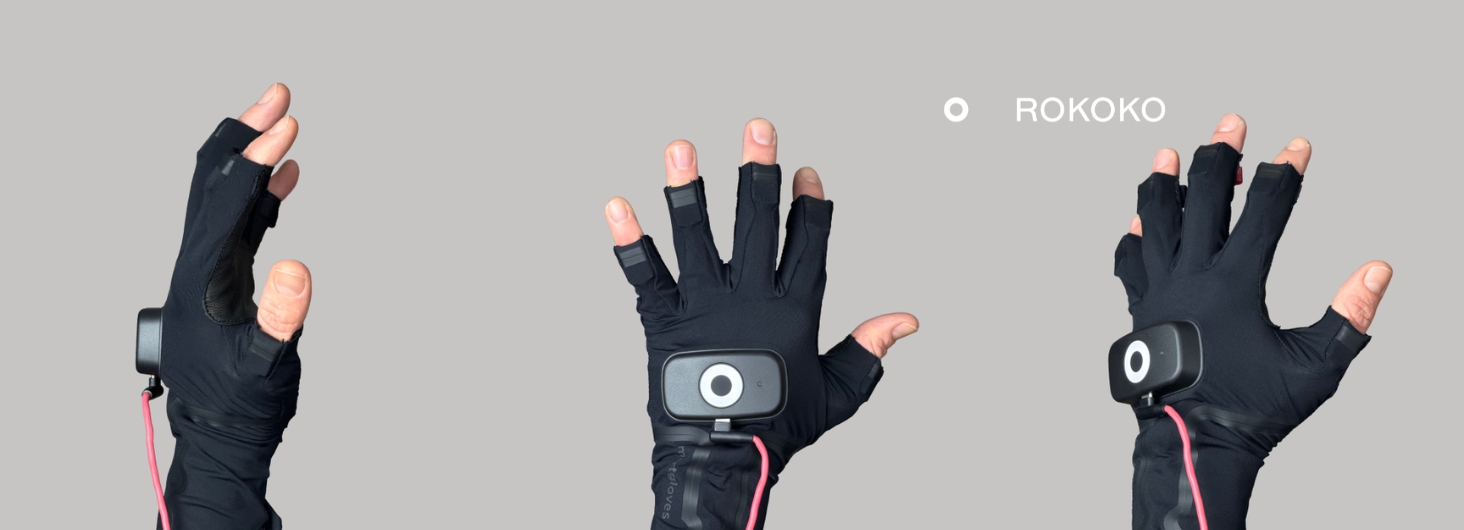
Free 3D Animation Tool: Animate with Rokoko Studio

Rokoko Studio is a real-time 3D character animation software. On download, you’ll get access to a library of pre-set mocap movements for quick use. Plus, if you own one of our mocap suits (see the low-cost pricing here), you can capture custom motions in real-time. This is exactly the pipeline that Trizz.tv studios used to rapidly create a high-quality commercial for their client in a matter of days. Watch the behind-the-scenes below and read the full story here.
As you can see, motion capture tools greatly accelerate and simplify the animation process. Rokoko Studio works seamlessly with common 3D animation software tools such as Blender, Autodesk Maya, or Cinema 4D. Download it here.
Best All-Round Free 3D Animation Software: Blender

If you’re a beginner and looking for 3D modeling software, Blender is by far the best choice. This open-source program is an excellent starting point. And it’s used by professional indie studios around the world. The program provides a broad spectrum of functionality for modeling, texturing, lighting, animation, and video post-processing. Learn more about 3D character animation in Blender. It’s worth mentioning that the paid tools Autodesk Maya and Cinema 4D are more prolific than Blender due to their comprehensive toolset. However, the main learning curve for 3D animation is 3D animation itself - not the software. If you know Blender well enough, it’s possible to get used to Maya in a week or so.
What hardware do I need to get started with 3D animation?
Animation requires serious processing power. However, it’s possible to do basic animation on a mid-range computer. From personal experience, animation is easiest when you have 8+ gigs of DDR4 RAM, an i7 CORE, and a decent graphics card.
How do I get started in a career in 3D animation? Even if I have no experience?
There are three ways to get started with a career in 3D animation.
- Tertiary study at a university, college, or multi-year certification program.
- Self-taught with online programs that are paid or free (though I recommend paid). You’ll need at least a year-long program to be considered an entry-level generalist.
- Get an internship and make coffee. This is the old-school method and - paired with your own self-study - can be a cost effective way to get experience that money can’t buy.
Frequently asked questions


Book a personal demonstration
Schedule a free personal Zoom demo with our team, we'll show you how our mocap tools work and answer all your questions.
Product Specialists Francesco and Paulina host Zoom demos from the Copenhagen office


